Getting Started
Experience true data sovereignty with blockchain-powered encryption.
What is Keyura?
Keyura is a decentralized platform that puts you in complete control of your sensitive data. Store documents, notes, seed phrases, and any confidential information with
Name origin: Keyura wasn’t named by AI/GPT. I did some homework and chose it from Sanskrit — it refers to a protective ornament historically worn by men — a nod to protection and trust.
Key Features
Client-Side Encryption
Your data is encrypted in your browser (AES-256-GCM, PBKDF2 100k) before it ever leaves your device.
Blockchain Immutability
Your personal smart contract on Polygon stores encrypted references, creating an immutable record.
IPFS Distribution
Encrypted files are distributed across IPFS nodes, eliminating single points of failure.
Zero-Knowledge Architecture
Only your wallet and password can decrypt your files. We cannot access your data.
Traditional Cloud Storage vs Keyura
Prerequisites
Before you begin, ensure you have the following requirements:
 MetaMask Wallet
MetaMask browser extension is required to interact with Keyura. The Polygon network will be automatically added when you create your profile.
 POL Tokens
You'll need POL for gas fees to deploy your contract and sign transactions. A small amount (~0.2-0.3 POL) is sufficient for getting started.
Security
Military-grade encryption meets blockchain immutability
Encryption Standards
All cryptographic operations are executed client-side in your browser before any data transmission. We implement industry-standard encryption algorithms with enhanced security parameters.
Encryption Algorithm
Advanced Encryption Standard with 256-bit keys in Galois/Counter Mode, providing both confidentiality and integrity protection.
Key Derivation
Password-Based Key Derivation Function 2 with SHA-256 and 100,000 iterations, making brute-force attacks computationally infeasible.
Unique Salts & IVs
Each encryption operation uses unique 12-byte initialization vectors and salts, preventing rainbow table attacks and ensuring identical data produces different ciphertexts.
Zero Server Access
All encryption, decryption, and key derivation happens exclusively in your browser. Servers never receive passwords, keys, or plaintext data.
Blockchain Storage Architecture
Your data is distributed across multiple layers, with blockchain storing only encrypted references and metadata—never plaintext content.
On-Chain (Polygon)
- Encrypted IPFS CID references (XOR-encrypted with password)
- Entry metadata (name, type, size, timestamps)
- Key verification hashes (keccak256)
- Transaction immutability guarantees
IPFS Network
- Encrypted file content only (AES-256-GCM ciphertext)
- Content-addressed storage with unique CIDs
- Distributed across global IPFS nodes
- No plaintext data ever stored
Your Browser
- All encryption/decryption operations
- Password entry and key derivation
- MetaMask wallet integration
- Complete local control and processing
Smart Contract Security Model
Each user deploys their own personal vault contract on Polygon, ensuring complete ownership isolation. Contracts store only encrypted references and metadata—the actual decryption keys never leave your browser, making it mathematically impossible for anyone (including us) to access your data without your password.
Technical Data Flow
File Storage Process
- 1Password → PBKDF2 (100k iterations) → AES-256 key
- 2Generate random 12-byte IV for AES-GCM
- 3Encrypt file in browser → upload ciphertext to IPFS
- 4XOR-encrypt IPFS CID with password
- 5Store encrypted CID reference on blockchain
Text Storage Process
- 1Password → PBKDF2 (100k iterations) → AES-256 key
- 2Generate random 12-byte IV for AES-GCM
- 3Encrypt text content → Base64 encode
- 4Create key verification hash (keccak256)
- 5Store encrypted payload directly on blockchain
Privacy Guarantees
What We Guarantee
- No plaintext data ever leaves your device
- Passwords never transmitted or stored on servers
- Decryption keys exist only in your browser session
- No backdoors, master keys, or recovery mechanisms
- Mathematically impossible for us to decrypt your data
Important Considerations
- Lost passwords are permanently unrecoverable
- Secure your devices and MetaMask seed phrases
- Always verify the correct domain before connecting
- Keep your browser and MetaMask updated
Using Keyura
Step-by-step guide to securing your data with blockchain encryption
Step 1: User Setup & Profile Creation
Begin your journey by setting up your Keyura profile. This one-time setup connects your MetaMask wallet and creates your secure login credentials.
Connect MetaMask Wallet
- 1Visit
keyura.vercel.app/user-setup - 2Click "Connect Wallet" to authorize MetaMask
- 3Polygon network will be automatically added if not present
- 4Your wallet address will be displayed once connected
Set Login Password
- 1Create a strong login password for Keyura access
- 2This is separate from your encryption passwords
- 3Complete profile creation to proceed
What Happens During Setup
Wallet Detection
MetaMask installation check
Network Setup
Automatic Polygon addition
Profile Creation
Secure login credentials
User Setup Process
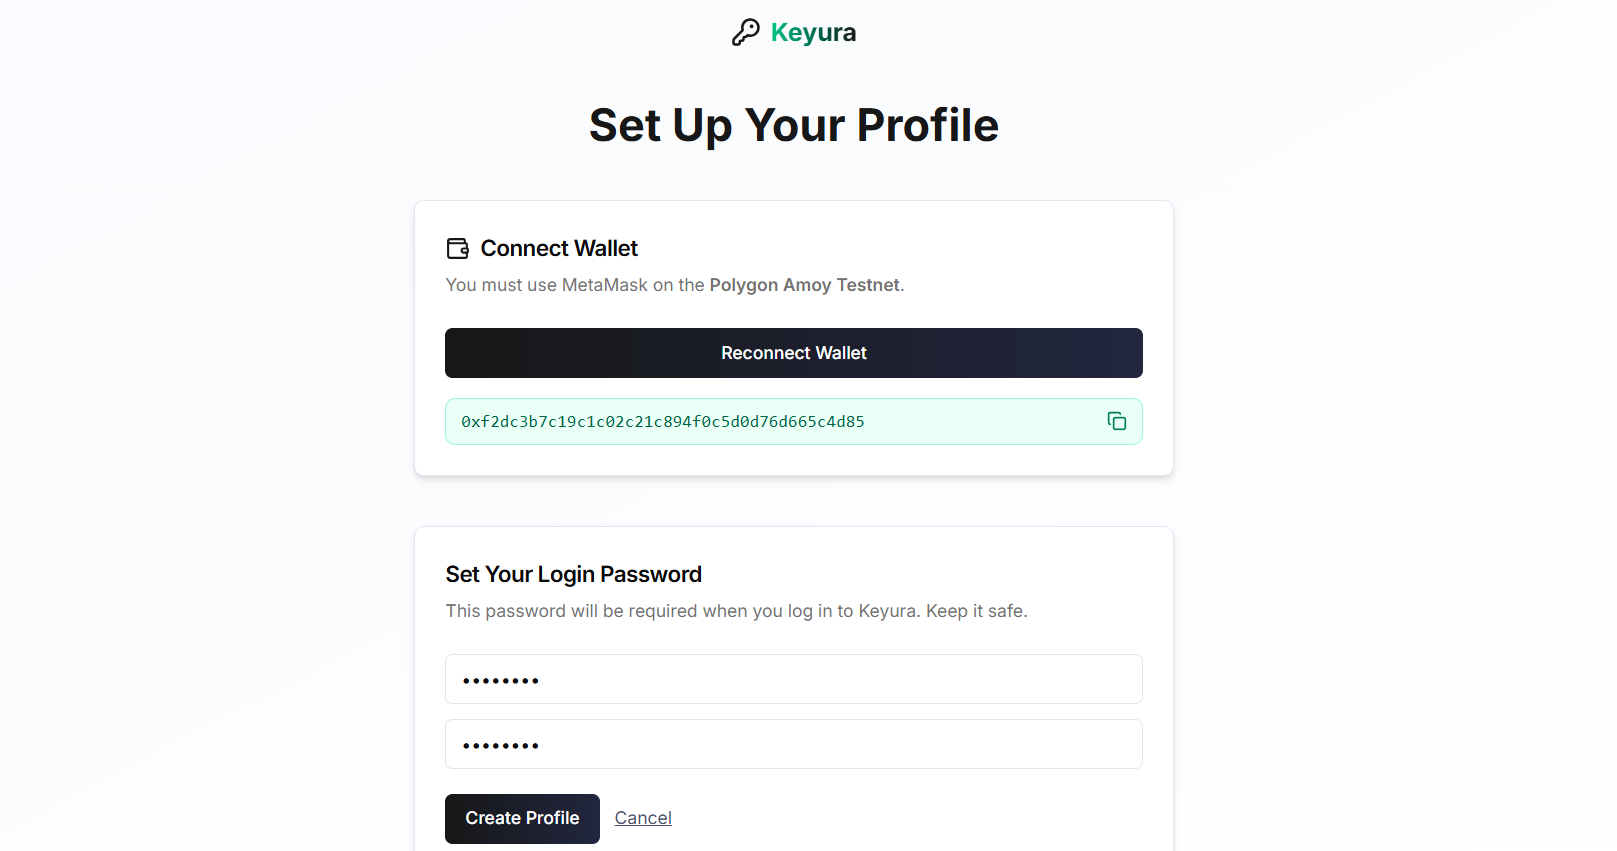
Screenshot showing wallet connection and profile creation flow
Step 2: Login & Dashboard Access
After completing your profile setup, you'll be redirected to the login page to access your secure dashboard.
Secure Login Process
- 1Navigate to
keyura.vercel.app/login - 2Enter your wallet address and login password
- 3Successfully authenticate to access dashboard
Dashboard Overview
Step 3: Deploy Your Personal Vault Contract
Your personal vault is a smart contract deployed exclusively for you on Polygon. This one-time setup creates your secure storage infrastructure.
Deployment Process
Initiate the smart contract deployment process
Approve the deployment transaction in your MetaMask wallet
Your unique vault contract address will be displayed
Contract Features
- Owner-only write permissions for maximum security
- Functions to store and retrieve encrypted entries
- Permanent vault ID tied to your wallet
- Typical deployment cost: 0.2–0.3 POL
Using Existing Contract
If you already have a deployed Keyura contract, you can use it instead of deploying a new one.
- 1Enter your existing contract address
- 2Verify ownership through wallet signature
- 3Access your existing vault data
Empty Contract Settings
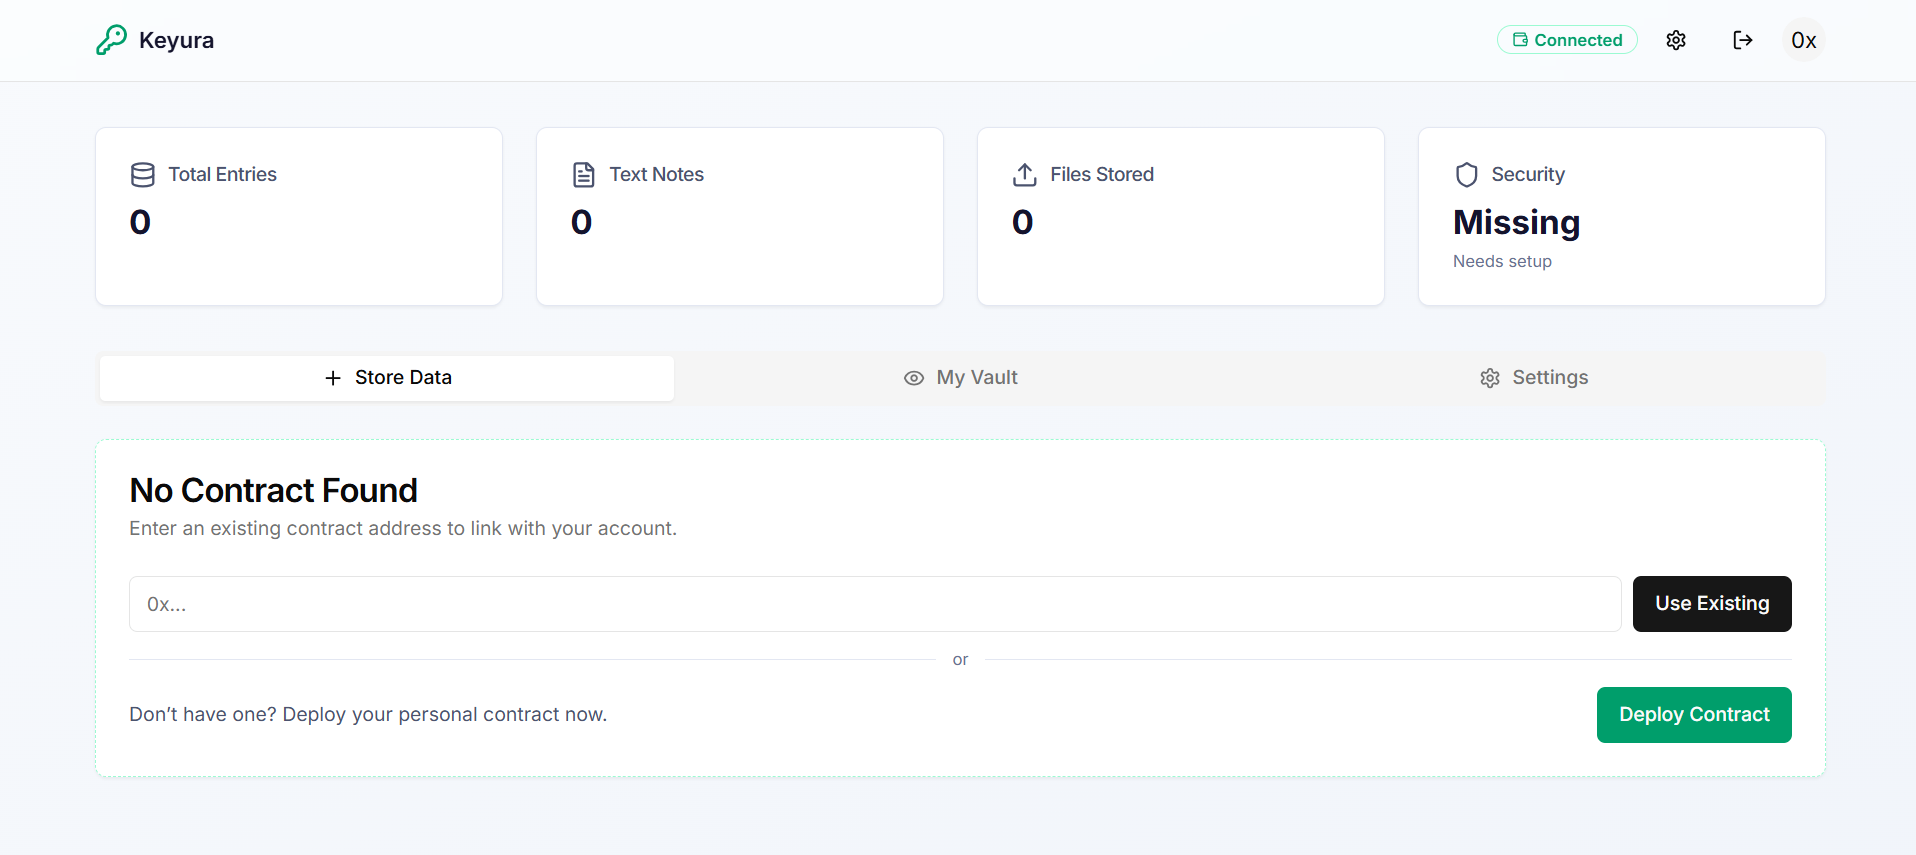
Shows initial state before contract deployment
Step 4: Storing Your Data
Once your contract is deployed, you can securely store both files and text data. Each entry can have its own unique encryption password for maximum security flexibility.
File Storage
Upload Process
- 1Go to "Store Data" tab and select "Store Files"
- 2Click to select your file (max 2 MB)
- 3Enter a custom name (optional)
- 4Set a strong encryption password
- 5Click "Encrypt & Store File"
Technical Process
- 1File encrypted with AES-256-GCM in browser
- 2Encrypted blob uploaded to IPFS
- 3IPFS CID encrypted with your password
- 4Encrypted reference stored on blockchain
- 5Transaction hash recorded for verification
Text Data Storage
Storage Process
- 1Select "Store Text/Notes" option
- 2Enter a descriptive entry name
- 3Type or paste your text content
- 4Set encryption password
- 5Click "Encrypt & Store Text"
Common Use Cases
- Cryptocurrency seed phrases and private keys
- Important passwords and PINs
- Confidential notes and documents
- 2FA recovery codes
- Legal contracts in text format
Storage Interface
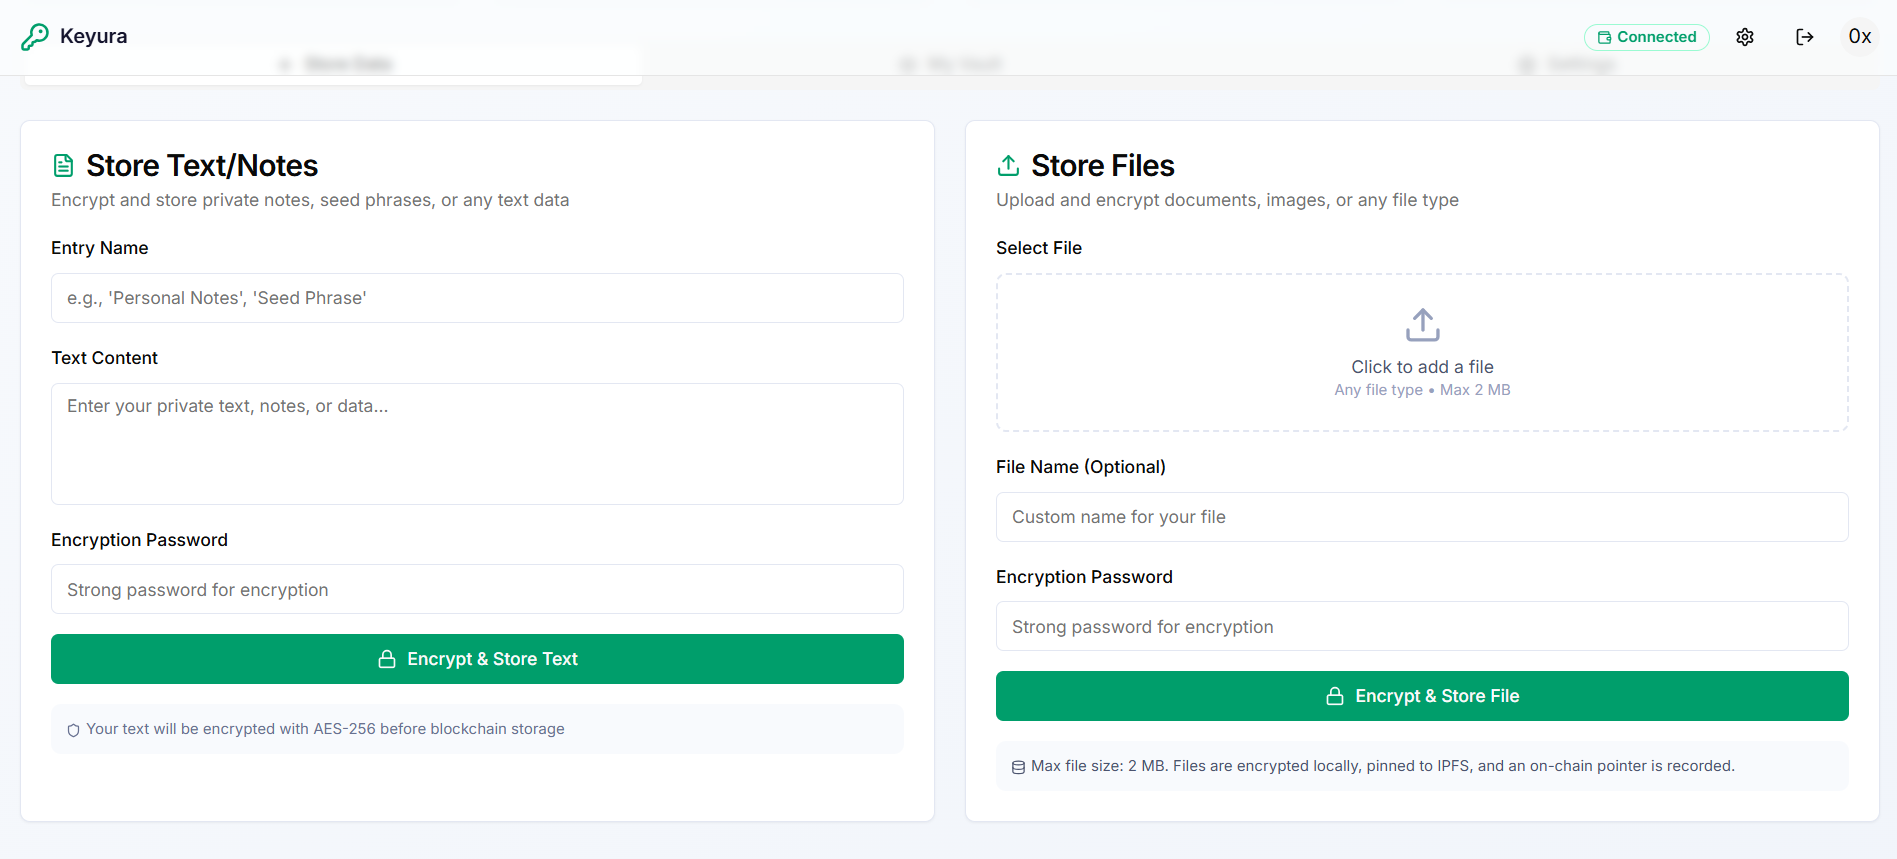
Shows file and text storage fields after contract deployment
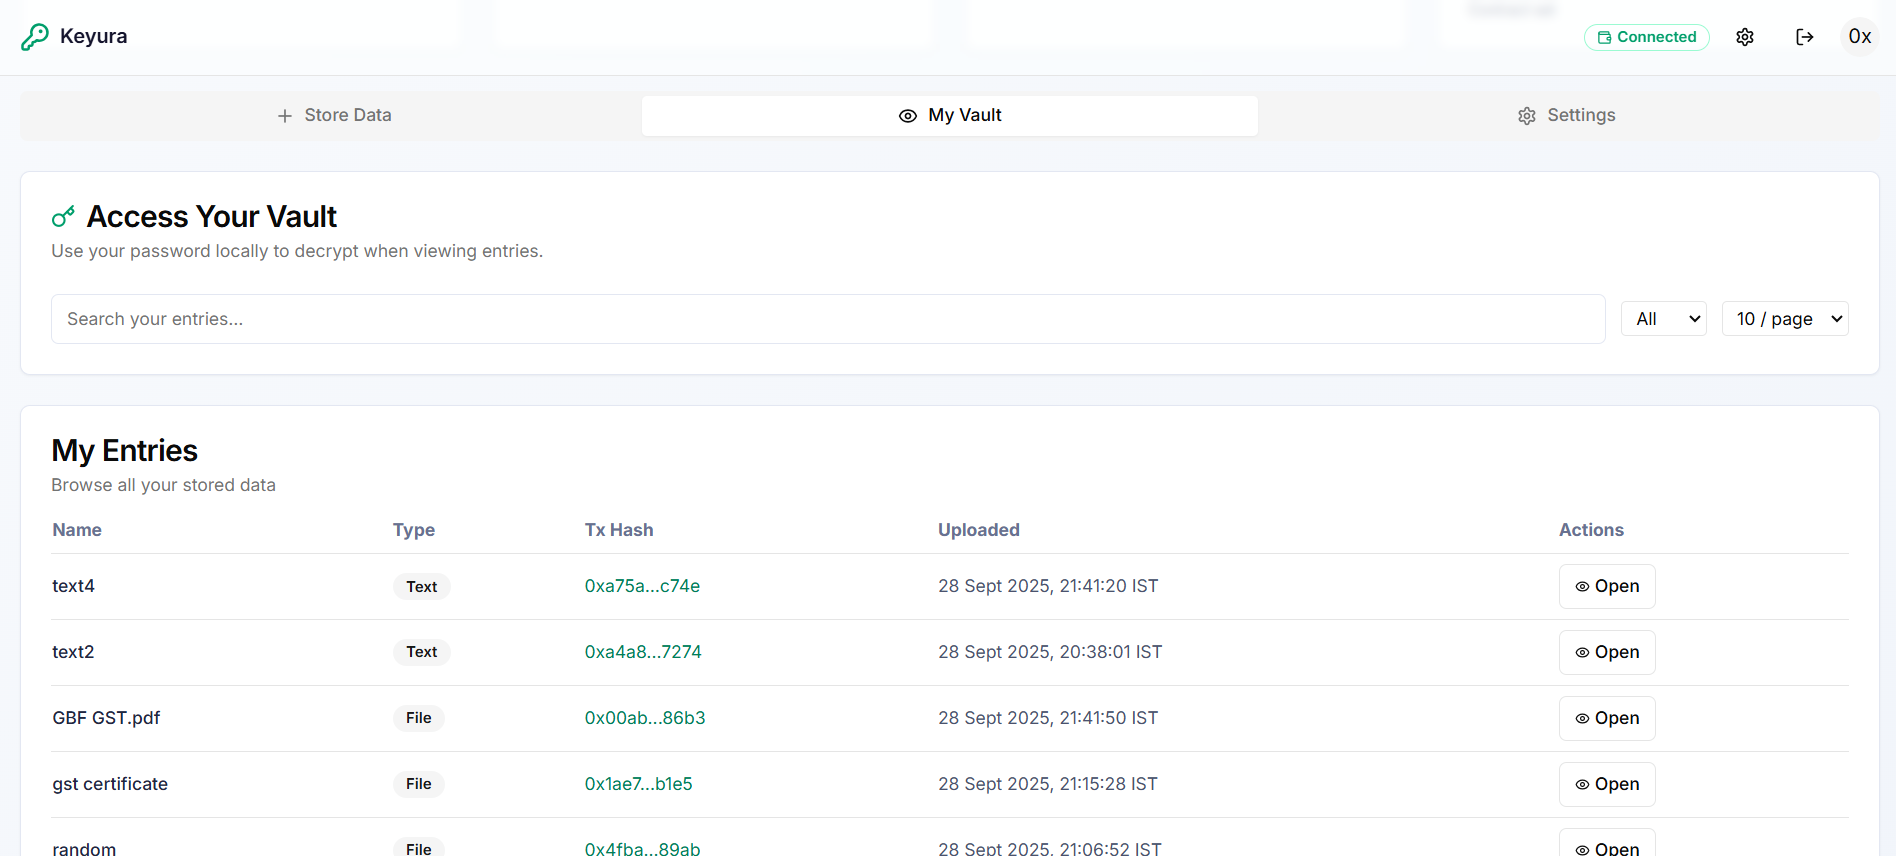
Step 5: Accessing Your Stored Data
Retrieve and decrypt your stored data using the "My Vault" tab. Only your encryption passwords can unlock your content—ensuring complete privacy and security.
Vault Data Table
Your vault displays all stored entries in an organized table format with the following information:
Entry Name
Custom name or filename
Data Type
Text or File indicator
Transaction Hash
Blockchain verification link
Actions
Open/decrypt button
Decryption Process
Step-by-Step Decryption
Click on the 'My Vault' tab to view all your stored entries
Click the 'Open' button in the Actions column for your desired entry
Provide the specific password you used when storing this entry
View text content or download decrypted files locally
My Vault: Screens & Actions
Technical Decryption Flow
- 1Decrypt on-chain CID reference using your password
- 2Fetch encrypted content from IPFS using decrypted CID
- 3Decrypt content locally in your browser with AES-256-GCM
- 4Render text or download file directly to your device
Quick Reference Guide
Complete Workflow Summary
Setup Profile
Connect wallet & create login
Login
Access your dashboard
Deploy Contract
One-time vault setup
Store Data
Encrypt files & text
Access Vault
Decrypt & retrieve
Key URLs
keyura.vercel.app/user-setupkeyura.vercel.app/loginkeyura.vercel.app/dashboardRemember
- • Login password ≠ Encryption password
- • Each entry can have unique encryption
- • Contract deployment is one-time only
- • All decryption happens in your browser
- • Lost passwords cannot be recovered